Recording an audio can become a hectic task if you are not aware of the tools and techniques. There are many tools and software available in the market that can make audio recording into an amazing experience. One such free tool is Audacity. In this post, I will give you a quick Audacity Tutorial on how to record audio and do voice overs using Audacity.
In this Audacity Tutorial, you will learn how to record voice overs using an external microphone. I’ll be using a Lavalier Microphone in this tutorial. You can use other microphones too. The setup for other microphones is same.
But before this, you will first need to install Audacity on your computer.For this click below for Audacity free download.
Audacity Tutorial:
Step 1 – Download and Install Audacity:
Download Audacity from the above link and install it in your system. Please check the minimum requirements and the system of your computer. Audacity has different versions for Windows, Mac, and Linux.
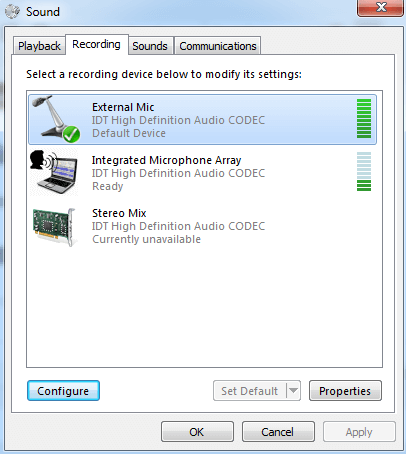
Step 2 – Setup the Microphone:
Attach your microphone to the mic jack of your PC.
Go to Control Panel -> Hardware and Sound -> Sound
Click on the Recordings tab and setup the microphone. Do remember to switch on the microphone while doing this. I had wasted an hour during my first attempt as I had not switched ON my lavalier mic. I hope that you are intelligent than me.
You can also use the laptop microphone as default if you don’t have an external microphone. But I would always suggest you to use an external microphone such as the USB microphone (Blue Yeti mic) or a Lavalier microphone (Audio Technica ATR- 3350) to do voice overs because they help in recording a clear voice by smushing and reducing any background noise.
Step 3 – Open Audacity:
Open Audacity from your PC -> Choose the microphone
Choose the mic that you have set up above to record the audio. DO remember to plug in in the microphone first and then open Audacity otherwise it won’t show your mic.

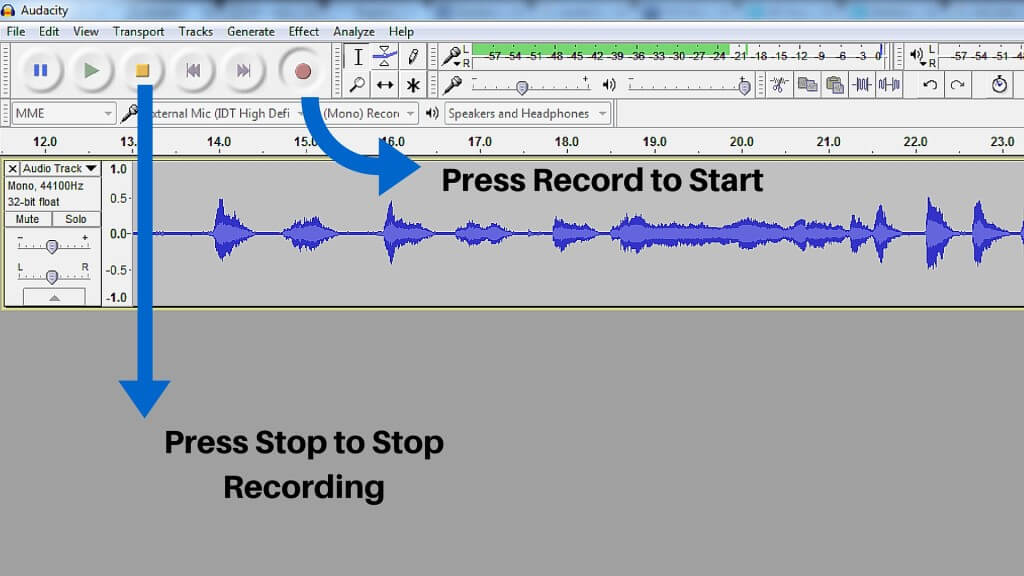
Step 4 – Click the Record Button:
Click the record button to record the voice over. You will see the waveforms for your voice. This means that your voice is being recorded correctly. Click the stop button to stop the recording.
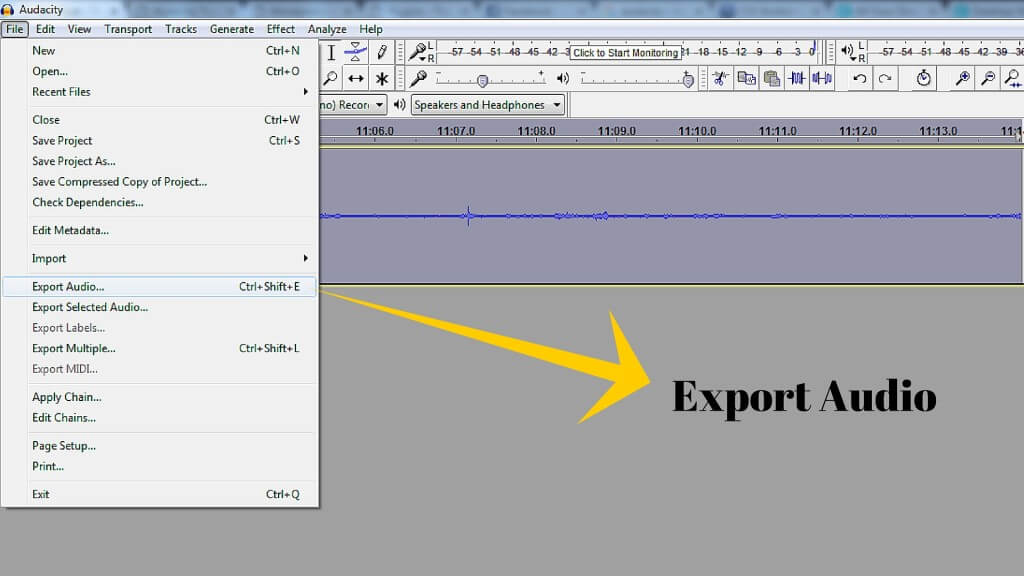
Step 5 – Export the Audio:
Click on File -> Export Audio to export the audio recorded to your desired location. You can use different settings for exporting audio like the .mp3, .wav extension etc.
That’s it! You have become a successful voice over artist. Now you can record sound and audio for YouTube videos.
In this Audacity Tutorial, I have covered all the basic aspects of sound recording. You can also use other software like the Adobe Auditions to add effects and more transitions to your audio. But, first, practice 5-10 voice overs on Audacity using this Audacity Tutorial. This will help you to understand the basic sound recording techniques.
I hope this Audacity Tutorial will kickstart your voice over career.
This Audacity Tutorial can also be used for dubbing videos and make cover songs of popular artists.Do share your views in the comment box below. I’ll be happy to answer your queries and doubts if you have any.
Also read: Best cameras for YouTube videos
Do share this post with your friends. They’ll thank you if they become the next Justin Bieber or Miley Cyrus of their town.
2 comments
Thats’s a helpful post. Thank you
Hi Jhon
Good to hear that from your side.
Stay tuned for more!